The store will not work correctly when cookies are disabled.
We use cookies to make your experience better.To comply with the new e-Privacy directive, we need to ask for your consent to set the cookies. Learn more.
Magento 2 provides us with to import of Product data to add or modify the products, restore existing data and delete entities. This feature helps us a lot of time compared with manually configuring. Truly, most of the data in Magento is gathered in CSV (Comma Separated Value file) which looks similar to the Excel file but simpler. So, we suggest you become well-known with CSV files to import and export other types of data besides products such as customer data, customer address data, and product images.
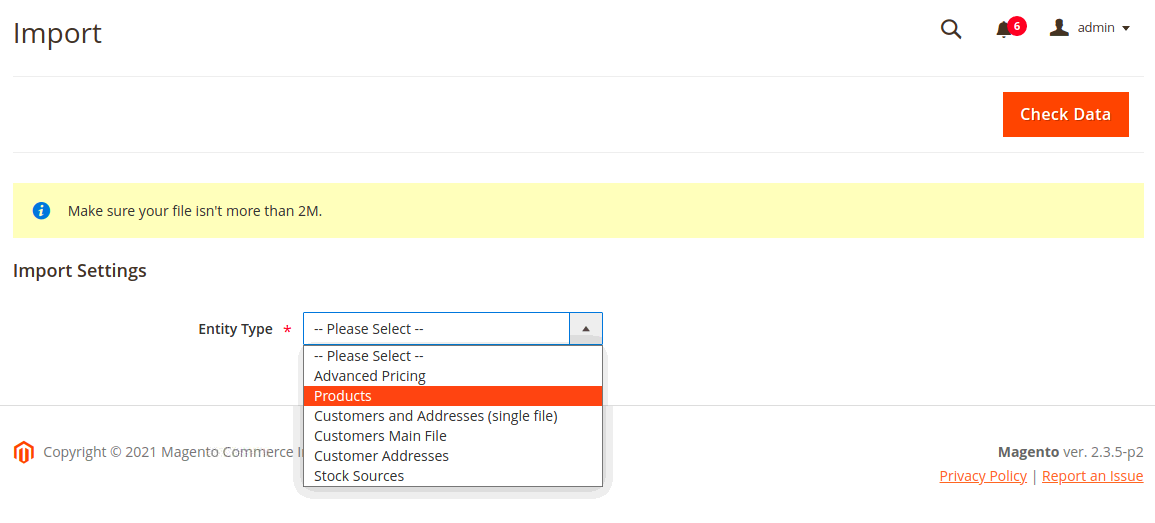
On the Dashboard, choose System > Data Transfer > Import.
In the Import Settings section, set Entity Type to "Products" as you are importing product data.
After choosing the Entity Type, click Download Sample File. If you are inspired, click Save to start downloading the file.
Now Open to observe the Sample file.
Make sure that your CSV import file follows the sample file specifically.
Verify that the size of your import files Should not exceed the limit of 2M given in the message.
If the import data adds paths to product images, make sure that the image files have been uploaded to a suitable location. The default location on the Magento 2 server is pub/media/import. If the images stay on an external server, make sure that you have the full URL to the directory that includes the images.
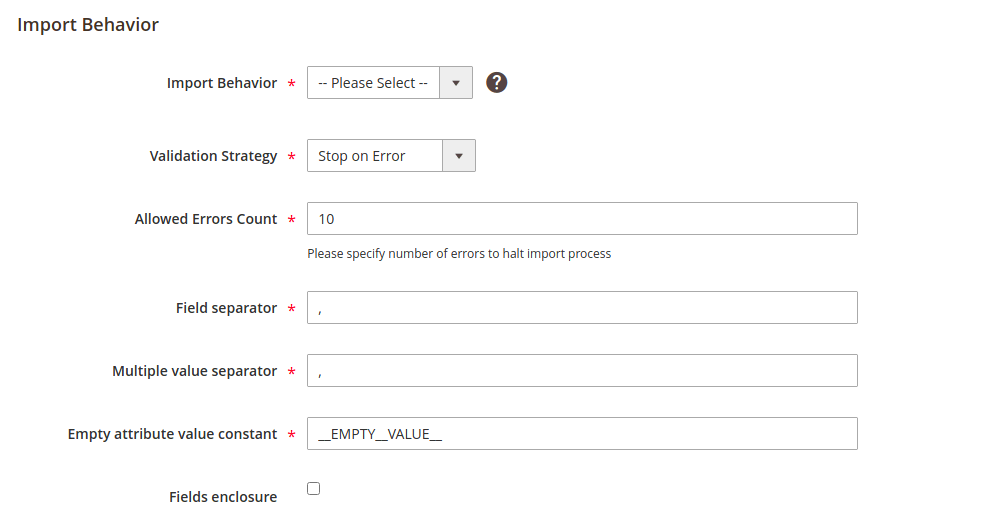
Configure Import Behavior
In the Import Behavior field, select the action you require when importing data in the import Import Behavior section: "Add/Update", "Replace Existing Complex Data" or "Delete Entities". Then set the following field to "Stop on Error" or "Skip Error Entries".
In the Allowed Error Count field, open a number of errors to pause the import method.
In the Field separator and Multiple value separator fields, leave the default as "," because the default separator in CSV files is a comma.
In Empty attribute value constant, When renewing existing (not adding new) products this is where you specify the constant and if obtained in your CSV will clear the existing attribute value.
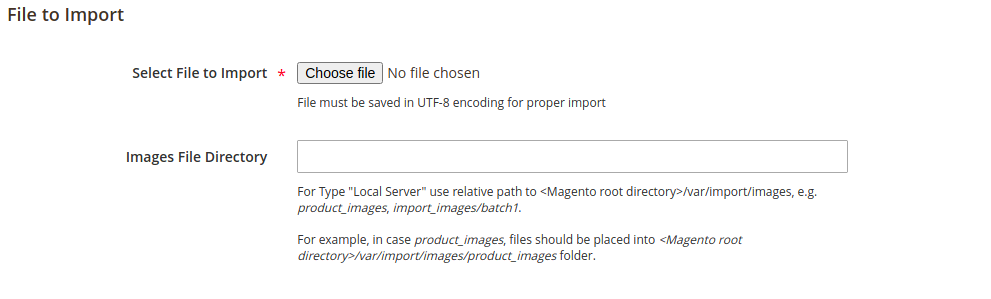
Specify the Import File
In the File to import field, click on the Choose File button and choose your import data file, then click Open.
If the import data contains paths to the product images, in the Images File Directory field, enter.
The path to the uploaded images on the Magento 2 server. For Example: var/import.
Or the full URL to the images on another server.
For Example http://domain.com/images.
Check the Data and Finish the Importing
In the top-right corner, click Check Data and ready for the method to finish.
If the file is confirmed, click the Import button displayed in the Validation Results. Contrarily, fix the problem notified in the message, and try again.
When the importing finishes, there will be a message to notify you.
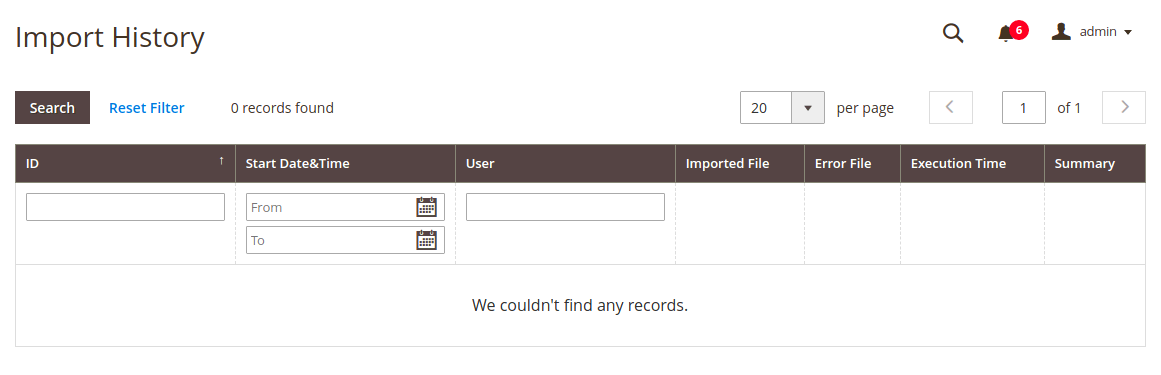
View the Import History
On the Dashboard of Magento 2, System > Data Transfer > Import History.
The import history detail table will show all the actions of import/export for you to track.